

Identifying which keys lift less than target upweight is a sensible starting point for weighing off an action. At the most basic level, any key that will not lift 20 grams may have repetition problems. This criterion can point to excessive friction somewhere in the system or an error in the original weighoff or a filing of hammers that left some too light for their key's compensatory lead. Ironically, the quickest fix for this situation may be to add a key weight on the other side of the balancerail. Or you can remove one from the player side, but this should include mending the hole, which ups the cost.
For a full weighoff, samples will indicate best specifications. My choice of upweights, however, will be the same regardless. A 20g upweight in the low bass provides good repetition without feeling any heavier than necessary. And in the high treble, a readily-lifted 25g is enough.
A 37g balanceweight gives dynamic presence to keys and this Mason & Hamlin A had quite a number already there after lead removal. I had lightened the hammer side of the action, mostly by changing out the heavy brass capstans for anodized aluminum ones, and I had tweaked rail positioning for the new parts. With these adjustments in place, 37g was the weight, if placed at the front of a key, that would keep it balanced with both ends in the air. Friction in the system makes comparing upweight and downweight a best way to measure this and also to troubleshoot inconsistencies in the friction.
In the bass, 34g pairing weight on 20g upweight makes 54g downweight. Halfway between what will depress the key and what the key will lift (downweight and upweight) lies the balanceweight (37g). If you reduce the pairing weight by 2g for each 1g increase in upweight, the balanceweights will be the same and the downweights will decrease by 1g for each increase in upweight of 1g. So, this piano will have a 49g downweight and 25g upweight in the high treble.

Three strategies for action balancing predominate. A traditional one has downweights evenly tapered (generally from 50’s in the bass to 40’s in the treble) ignoring upweights except to have none below threshold (minimum 19g bumping topstack). This leads to no failures to repeat but also to inconsistencies that slightly undermine playability and perceived evenness of tone. A superior version of this method makes upweights evenly taper (from 20g in the bass up) and lets downweights vary.
In the second approach, consistent balanceweight renders more downweight in the bass, less in the treble (like the first strategy) but with upweights tapering consistently in the opposite direction. The third method keeps downweights consistent (pairing weight reduces by 1g for each 1g increase in upweight). In both of these cases, upweights from 20g to 25g serve well.
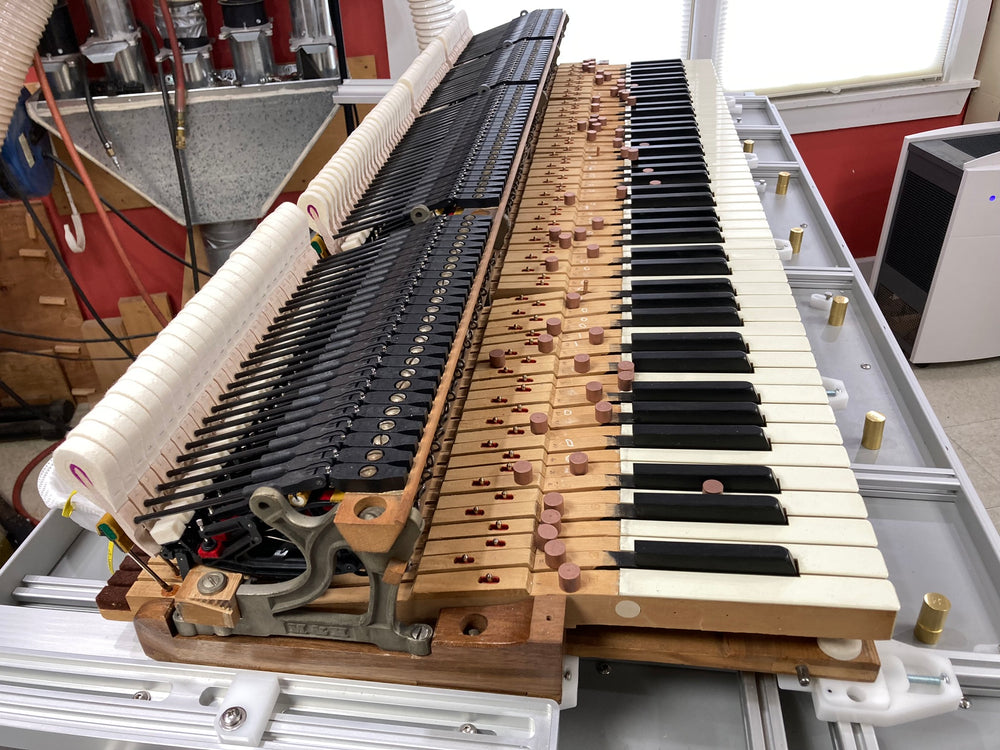
I test each key with target upweights and downweights (see the photo above). If friction is okay, those whose hammers don't return all the way to rest while lifting their upweight will need lead removal. I chalk them with a minus sign. Those that are to my spec get a 0 and those that will need additional compensation I leave blank or add the proposed key weight on the key above its proposed location. Then I shift gears to remove lead.

A tap by light hammer and punch with key supported over a hole big enough for the lead to drop through works with little setup. And tapping the lead back the way it came will generally produce less breakout. The hole will then have to be cleaned out and made plug-ready with an oversized bit. In the case where leads are in blind holes, there is usually a small hole on the blind side where the tip of the bit broke through during drilling. The point of a slightly undersized center punch can pick up that hole and push the lead out, wood and all.
Pianotek sells a 37/64" core drill whose slightly oversized hole facilitates the insertion and gluing of 9/16" plugs. I set up with a block and cammed clamp to support and secure each key for drilling. I stop the drillpress after each hole, which gives me time to unclamp key, return it to tray, pick up the next and, using a wedge to adjust for varying key width, clamp it in place for its hole. The beveled tip of the not-spinning core drill self-centers in the target hole and holds the key in place until clamped. Every new hole comes out perfectly centered by the old hole, way reducing risk of a rough entry or exit.

Next comes the gluing in of plugs. I add water-based wood glue to hole only (using a spinet hammershank). The slightly loose fit minimizes glue push-through for less other-side-of-key mess and water in the glue swells key and plug for a tight joint.

I prefer the simplicity of trimming with a sharp chisel, backstopping the key for safety and convenience. An open wooden vise works well and will not threaten keytop cosmetics. Also, it equally receives natural or sharp, keyfront or keyend. Grain of plug orients the key by ease of slice. If both sides need attention, the flip side will have the opposite orientation.

With lead removal, hole cleaning, and plugging done, keys go back on keyframe for action reassembly and weighoff. Key bushing and balancehole sizing may be appropriate first. Too much friction will clearly interfere, but too much play can too, undermining squaring and spacing stability at the bushings and geometry at the balanceholes.
Now the weighing off can proceed. I start in the bass with my combination of 34g pairing weight and 20g upweight, lifting the pairing weight to observe upweight speed, adding it back on to observe downweight. While one hand lifts and returns pairing weights, the other hand places key weights to find where upweight and downweight speeds match (making sure no existing lead is in the way). If there are still friction inconsistencies, the matching speeds will be slower or faster pointing to too much friction or too little. This dance continues as a meditation (much like making hammers and their travel vertical on the Squaring Platform) until all keys have been addressed.

In the photo above, the one key weight on the other side of the balancerail can actually keep inertia more even depending on what lead is and isn't in surrounding keys. This is reasonable unless there are several (you can see another in the lead photo and there were others). Machinists will leave an existing setup in place for exactly this kind of situation. With a left-in-place boring setup, follow-up goes quickly.

After completing the weighoff, I remove keys one-at-a-time to a tray, chalk-marking where the key weight will go on the side of the key to drill from. I use the same wedge-refined clamping of key and a face-cutting endmill that makes its own hole in the supporting block for no breakout.

The copper I use for key weights is too hard to swedge, so I use a flexible CA glue designed for adhesion of disparate materials. With a sizing round first, the key weights push in nicely and set up firmly without mess or need for accelerator.

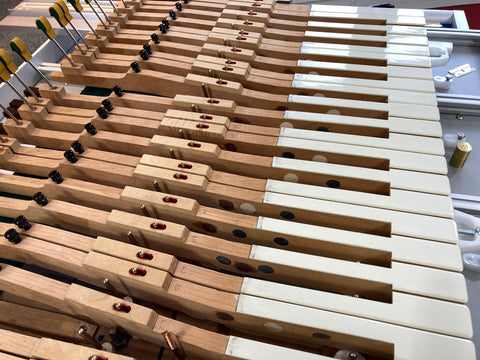
The placement of lead, lead-removal plugs, and added key weights in the photo below suggests the greater accuracy of my balanceweight weighoff from the original pattern leading. Some keys were in exact agreement, but most needed correction in one direction or the other.
With weights now installed, it's time for a sharp key blacking touchup.

And any final repairs...

Next time: Mason A - Final Regulating
2 comments
My second strategy may have a different implementation from your fourth, but I think it is essentially the same strategy. I make strike weight evenly tapered on my way to weighoff if I get to prepare and hang the hammers (if I don’t get to, the smoothing is slightly more constrained but still produces a good result). The placement of the key weight to match upweight and downweight speeds should equal the output of your computation of front weight but without the need for math. Although it is a trial and error procedure, it is very fast and very accurate. And also it addresses friction. If the upweight-downweight speed of one key is slower than its neighbor it has more friction, if faster less. If I can make top bass hammer’s weight equal bottom tenor’s (which I can with custom boring and blank tails) then upweights, downweights, and inertia all have smooth curves. I choose a balanceweight that best fits that piano’s action and implement it for both naturals and sharps, even though technically they want to be slightly different having different geometry. The continuity and simplicity of one balanceweight unifies the feel of the action with consistency and predictability. I ready the pairs of pairing weight-upweight combinations for that balanceweight from the start and it doesn’t matter which I choose where as long as the symptoms work. 34g over 20g and 32g over 21g and 30g over 22g overlap in applying a 37g balanceweight, but a 22g upweight probably won’t work well for, say, C16. 21g may work okay, however. Overlapping pairs can refine the choice of where to place a key weight. As noted, I like to have the upweight-lifting key return its hammer entirely to rest. When that happens, upweight and downweight will be in a well-balanced relationship.
There is a 4th strategy which is to smoothly scale Strike Weights and Front Weights to produce an average Balance Weight level. Any remaining inconsistencies in down or up weight may then be addressed by fixing friction or tweaking leverage.
Leave a comment